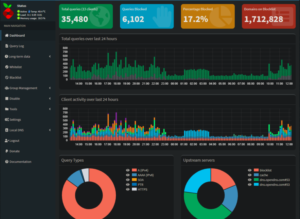
Pi-Hole is a great starting point for anyone that wants to strengthen their internal network security.
Before we begin with a walkthrough there are some important links we may need. For starters if you don’t have one already, you will need some software to write an image file to a removable drive. For this particular project I have chosen to use the official Raspberry Pi Imager.
Next, we will want to download the operating system. Again, for this project we are going to stick with the Raspberry Pi OS. You can take your choice of whether or not to use Desktop or the Lite version (Only Has Terminal Window). I recommend using the Desktop version, just because you can still use some RPi’s for other things as well. The desktop can be useful at times as well. You can use the Imager Tool to download and install, but it makes it a little faster if you already have it on your system.
Getting Started
As mentioned above you will need the Raspberry Pi Imager. You will also need a Micro SD card, USB, or SSD depending on how you have your RPi set up. We will cover the Micro SD card installation since it is where most beginners will start off.
Installing your os To a Micro Sd Card
- Insert Micro SD Card into your computer where you installed Raspberry Pi Imager.
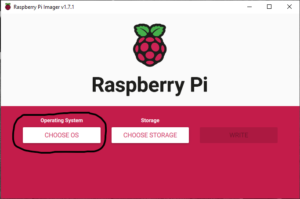
- Open Raspberry Pi Imager.
- Click on CHOOSE OS. (If you downloaded the image file scroll to the bottom and click, Use Custom, and navigate to the file to use)
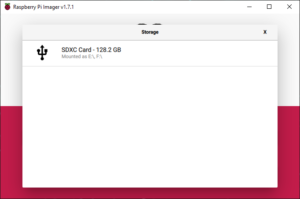
- Next you will want to Click CHOOSE STORAGE. Then select the SD Card.
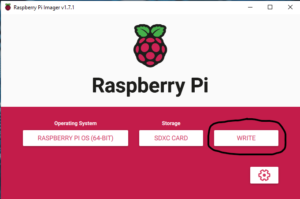
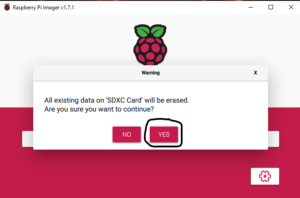
- Your next step Is the easy one. Just click WRITE. When the pop-up comes up click YES. Let the program Write and Verify. This just helps to ensure a non-corrupted file in the end.
- Now you are ready to put your SD Card into the Raspberry Pi and boot it up.
- Once you have your RPi booted up and go through the startup process. We want to make sure everything is up to date and upgraded before we install anything else. To do so we will want to open Terminal on the desktop. Or if you are using the Lite version you will already be at the terminal when you booted up.
Update And Upgrade Your OS
To Update And Upgrade your OS open up Terminal on your desktop and type the following:
sudo apt update && sudo apt upgrade -y
Sudo just tells the terminal you want to use super user/admin rights when performing the command. You may be prompted for a password when performing this command as well. The -y on the end just answers the “Are you sure you want to upgrade?” question.
This process may take some time if it’s the fist time you have done it. Don’t worry if it seems to be taking a long time.
“But Wait THere’s More!”
Now we will get into installing Pi-Hole onto your OS.
We are going to use the quick install method for now. If you have trouble with this method installing for you, check further down the page there will be other installation methods.
This is definitely the easiest way of installing Pi-Hole. All it requires is a terminal window and one line of commands
- Open your Terminal window.
- Type:
curl -sSL https://install.pi-hole.net | bash - Wait for Pi-hole to install. That’s it!
Time To Set Up Your Pi-Hole Blocklists.
The first thing you need to do is visit Blocklists.info and decide which lists you want to use. There are plenty of other sites out there offering Blocklists. If you do a quick Google Search you will find tons, but Blocklist.info is what I use and is a trusted site.
Warning: You can use all the list they offer but you will need to Whitelist some websites. You may not be able to access websites you need if you do not Whitelist them.

