MagicMirror²
The wonderful MagicMirror². Your own personal smart mirror. Made by…. you guessed it YOU! I really love this project because there are so many options available.

Getting Started
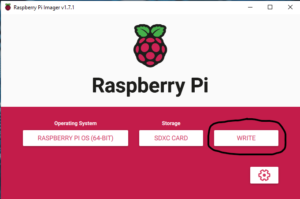
Getting started with this project is going to be the same as the Pi-Hole. Getting the OS running and upgraded on the RPI is exactly the same. If you do not know how to do that. CLICK HERE to review the process.
Once you have your OS installed and running. We will begin installing Magic Mirror.
- Open the Terminal by clicking on the Terminal icon in the taskbar or by pressing Ctrl+Alt+T.
- Update your Raspberry Pi by running the following command:
sudo apt-get update && sudo apt-get upgrade
- Install the required dependencies for Magic Mirror by running the following command:
sudo apt-get install curl git-core libnss3-dev libx11-dev
- Download the Magic Mirror software by running the following command:
curl -sL https://raw.githubusercontent.com/MichMich/MagicMirror/master/installers/raspberry.sh | bash
- Follow the on-screen instructions to complete the installation process. This will take some time as it installs all the required dependencies and packages.
- Once the installation is complete, you can start Magic Mirror by running the following command:
cd ~/MagicMirror
npm start
Magic Mirror should now be running on your Raspberry Pi. You can access it by opening a web browser on another device and entering the IP address of your Raspberry Pi followed by the port number 8080. For example, if your Raspberry Pi’s IP address is 192.168.1.10, you would enter http://192.168.1.10:8080 in your web browser.
That’s it! You have successfully installed and launched Magic Mirror on your Raspberry Pi.

Adding Modules and configurations
- Open the Terminal on your Raspberry Pi by clicking on the Terminal icon in the taskbar or by pressing Ctrl+Alt+T.
- Navigate to the Magic Mirror modules directory by running the following command:
cd ~/MagicMirror/modules
- Find a module you want to install from the Magic Mirror Modules Repository at https://github.com/MichMich/MagicMirror/wiki/3rd-party-modules.
- Once you have found a module you want to install, clone it from its repository on GitHub by running the following command:
git clone https://github.com/<user>/<module-name>.git
Replace <user> with the GitHub username of the module developer and <module-name> with the name of the module you want to install.
- Navigate to the newly installed module directory by running the following command:
cd <module-name>
- Install any dependencies required by the module by running the following command:
npm install
- Configure the module by editing the config.js file in the Magic Mirror root directory by running the following command:
nano ~/MagicMirror/config/config.js
- Add the module to the modules section of the file, along with any configuration options required by the module. For example, to add the module MMM-MyModule, you would add the following lines to config.js: (Indentation Is extremely important!)
{
module: “MMM-MyModule”,
position: “top_left”,
config: {
option1: “value1”,
option2: “value2”,
// …
}
},
- Save the changes to config.js by pressing Ctrl+O and then exit nano by pressing Ctrl+X.
- Restart Magic Mirror by running the following command:
That’s it! The new module should now be added to your Magic Mirror display. Repeat these steps for any additional modules you want to install.
