Creating A Home Linux Lab
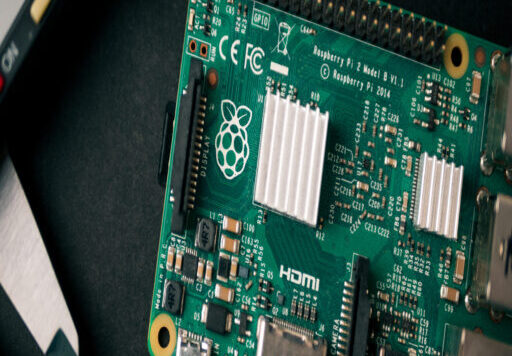
This guide will walk you through the process of setting up a Linux server on a Raspberry Pi using Ubuntu Desktop. We will use Raspberry Pi Imager to install the operating system onto a USB disk.
Materials Needed:
-
- Raspberry Pi 4 or 3
- USB Disk (at least 16GB recommended)
- MicroSD card (optional, for bootloader updates)
- Computer with Raspberry Pi Imager installed
- Keyboard, mouse, and monitor (for initial setup)
Step 1: Download and Install Raspberry Pi Imager
- Download Raspberry Pi Imager:
- Visit the Raspberry Pi website and download Raspberry Pi Imager for your computer (available for Windows, macOS, and Linux).
- Install Raspberry Pi Imager:
- Follow the installation instructions for your operating system.
Step 2: Prepare the USB Disk
- Insert the USB Disk into your computer.
- Launch Raspberry Pi Imager:
- Open Raspberry Pi Imager on your computer.
- Choose the Operating System:
- Click on “CHOOSE OS”.
- Scroll down and select “Ubuntu”.
- Choose “Ubuntu Desktop (for Raspberry Pi)” (preferably the 64-bit version if you’re using a Raspberry Pi 4).
- Select the Storage:
- Click on “CHOOSE STORAGE”.
- Select the USB Disk you inserted.
- Write the Image:
- Click “WRITE” to start the imaging process. This will erase all data on the USB disk, so make sure to back up any important files beforehand.
- Wait for the Process to Complete:
- Raspberry Pi Imager will download the Ubuntu Desktop image and write it to the USB disk. This may take a few minutes.
- Eject the USB Disk:
- Once the process is complete, safely eject the USB disk from your computer.
Step 3: Booting the Raspberry Pi
- Insert the USB Disk into one of the USB 3.0 ports (blue) on your Raspberry Pi.
- Connect the Monitor, Keyboard, and Mouse to the Raspberry Pi.
- Power On the Raspberry Pi:
- Plug in the power supply to turn on the Raspberry Pi.
- The Raspberry Pi should boot from the USB disk and start the Ubuntu Desktop installation process.
Step 4: Initial Ubuntu Desktop Setup
- Follow the On-Screen Instructions:
- Select your language, keyboard layout, and connect to a Wi-Fi network (if applicable).
- Create a User Account:
- Enter your name, choose a username, and set a password for your Ubuntu Desktop account.
- Complete the Setup:
- The installation will continue, and the Raspberry Pi will reboot once the setup is complete.
- Log In:
- After rebooting, log in with the username and password you created.
Step 5: Post-Installation Configuration
- Update the System:
- Open a terminal by pressing ‘Ctrl + Alt + T’.
- Run the following commands to update your system:
sudo apt updatesudo apt upgrade -yInstall SSH (Optional):If you want to access your server remotely, you can install OpenSSH by running:
sudo apt install openssh-server -y
- Enable USB Booting (if not already enabled):
- If your Raspberry Pi does not boot from USB by default, you may need to update the bootloader. Follow these instructions from the Raspberry Pi Foundation.
Step 6: Customizing Your Server (Optional)
- Install Additional Software: You can install any software you need for your server, such as a web server (Apache or Nginx), database (MySQL or PostgreSQL), or development tools.
sudo apt install apache2 -y
- Set Up a Static IP Address: Consider setting a static IP for easier remote access.
- Configure Automatic Updates: To keep your server secure, you might want to enable automatic updates.
Your Raspberry Pi is now set up with Ubuntu Desktop and can function as a Linux server. This guide provided a simple and informative walkthrough to help you get started, even if you’ve never done this before.
If you encounter any issues or need further customization, there are many online resources and communities that can provide support. Happy computing!

Some Options For Linux Distributions
Raspberry Pi OS
Raspberry Pi OS (formerly known as Raspbian) is the official operating system for the Raspberry Pi. It is a lightweight Linux distribution based on Debian, optimized for the Raspberry Pi’s ARM processor architecture. Raspberry Pi OS comes with a variety of pre-installed applications and tools, including the Chromium web browser and Python programming language, making it an excellent choice for beginners and educators.
Ubuntu
Ubuntu is a popular open-source Linux distribution based on Debian. It is designed to be easy to use, with a user-friendly graphical interface and a large software library. Ubuntu is known for its stability, security, and versatility, and it can be used for a variety of purposes, from running a desktop computer to building a web server. Ubuntu is also available in a lightweight version called Ubuntu Server, which is designed for headless systems.
Kali Linux
Kali Linux is a specialized Linux distribution designed for penetration testing and ethical hacking. It comes with a suite of pre-installed tools for network analysis, vulnerability assessment, and exploitation, making it a popular choice for cybersecurity professionals and enthusiasts. Kali Linux is based on Debian and can run on a variety of platforms, including the Raspberry Pi. While Kali Linux is not recommended for beginners, it can be a valuable tool for learning about cybersecurity and ethical hacking.
